All across the world, Android OS is known as the biggest operating system. But the use of Android can’t be seen on PCs or laptops. For PCs, Android uses the x86 architecture. Users who want to play Android games or access Android apps on their PC can surely install the Best Android OS for PC.
To enjoy the full Android experience on PC, you need to download Android-x86, which is an open-source project. This post will discuss how to install Android OS on a PC and laptop. We assure this process will give you an excellent user experience.
Table of Contents
Why We Need Android OS on a PC
Before installing Android OS on a PC and laptop, you must know why you need Android for your PC. We can say that the lack of Android on your PC causes the loss of a lot of advantages. Many users don’t find it comfortable to play games on Android mobiles. Instead, they want to enjoy the games on their PCs as well. Here comes the necessity of installing Android OS on a PC or laptop.
Android is not only an operating system; it is widely popular due to its availability across various platforms. The reason behind the popularity of Android is the experience that users get it from. Besides, this operating system is highly customizable and user-friendly. To avail of these benefits, you must install Android OS on your PC.
How to Install Android OS on a PC
There are several steps that you need to follow to install Android OS on a PC. The steps are as follows!
Step 1: Download the Android x86 ISO file
- Go to the Windows system and log in.
- Open any web browser to navigate to the official website of Android x86 OS.
- Go to the homepage and click on the Download button.
- Download the mirror page of the latest version of Android x86 OS.
- Select any one mirror from “Fosshub” or “OSDN” and get the ISO download link.
- For the OSDN ISO download page, click on the “android-x86-9.0-r2.iso” file name link to download the Android x86 ISO file. And for Fosshub, click on the “Android-x86 64-bit ISO file” to download the Android x86 ISO file.
- Save the ISO file to the computer and wait until the download is finished.
Step 2: Download the Rufus flashing tool
- Navigate to the official website of the Rufus flashing tool to create a bootable Flash Drive.
- Scroll down and click on the download link to download the latest version of the Rufus tool.
- Wait until the download is done.
Step 3: Flash Android x86 to USB flash drive
- Go to the download section and open the Flash tool by executing the file.
- You can see an empty dropdown box.
- Now, input a Flash Drive in the USB slot of the PC.
- In the Device dropdown box, Rufus will detect the Flash.
- From the download location, browse for Android x86 ISO and select it.
- For the Android x86 Flash Drive, type Label or go with the default label.
- Click on Start and then Yes to download the extra system files compatible with the ISO file.
- Click on OK and continue with the option ‘Write in ISO Image mode.’
- Click OK to complete flashing the drive and wait until it gets finished.
- Click on close once the Rufus window shows Ready.
Step 4: Set and Boot from a bootable Flash Drive
- Click on a designated key, including F2, F9, F10, F12, Esc, or Del, to enter the UEFI or BIOS setup.
- Find the booting device settings and choose USB Drive according to the booting device.
- Save and exit the UEFI or BIOS setup.
- The system will restart automatically.
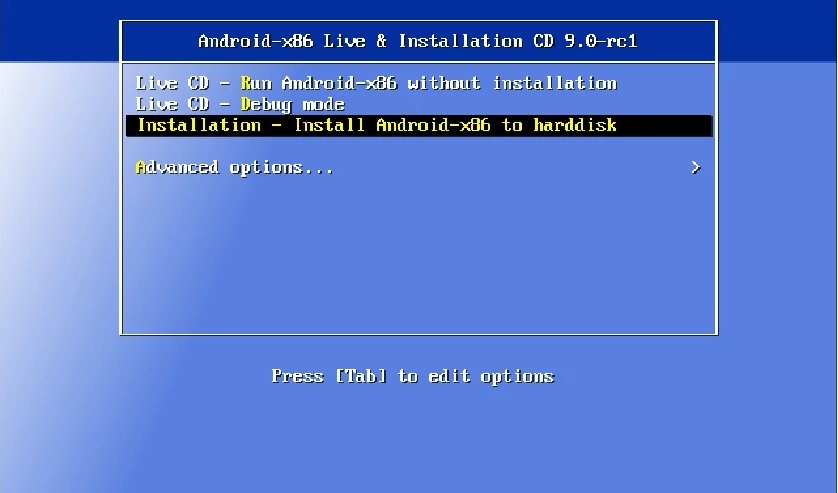
Step 5: Install Android x86 on the PC
- Once the system boots from the flash drive, the Android x86 splash screen will appear on the PC screen.
- Click on the Installation – Install Android-x86 to hard disk option to install Android x86 OS.
- The setup will show a list of partitions, including Flash Drive, Windows Partition, and Windows MBR Partition.
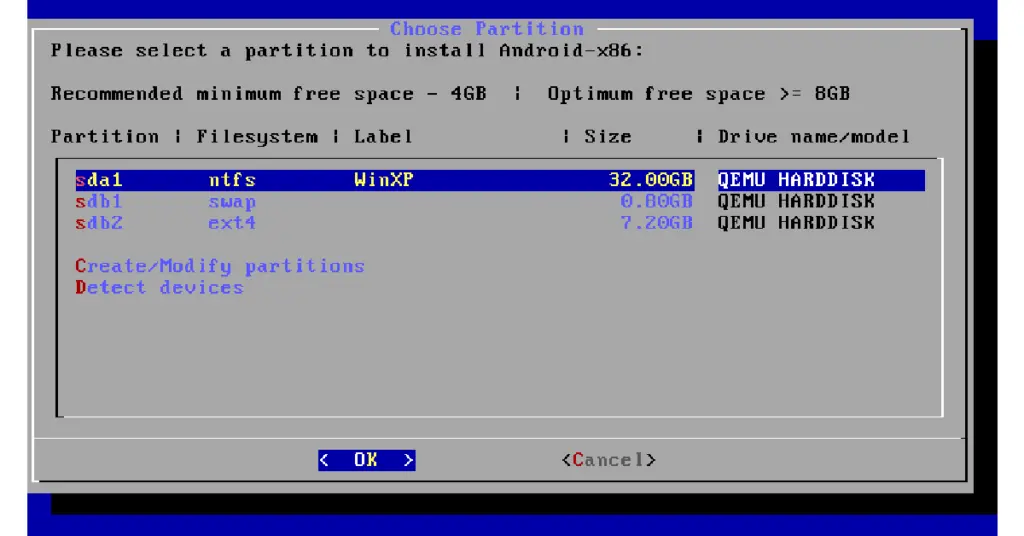
- Select the Windows partition and press enter to install Android x86.
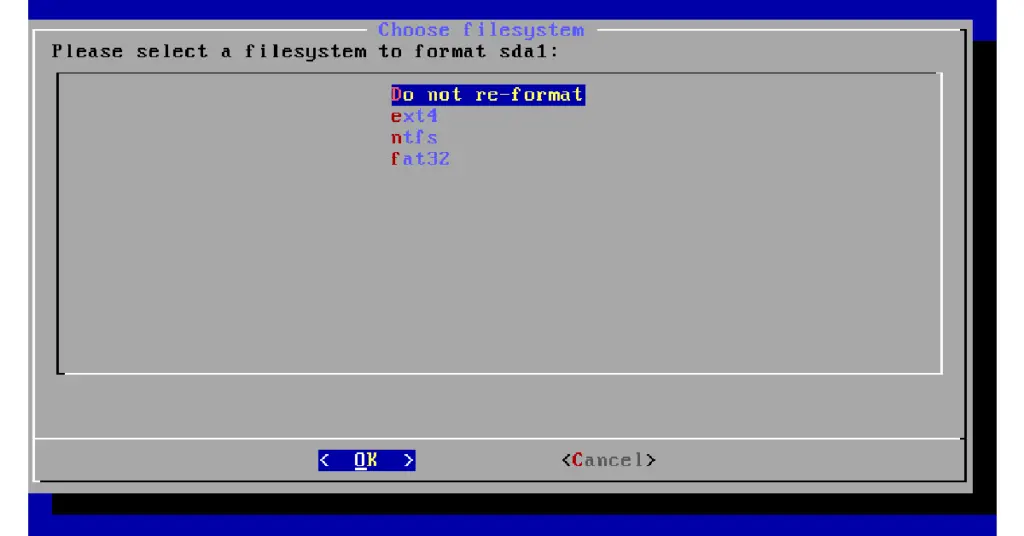
- Select ext4 to continue.
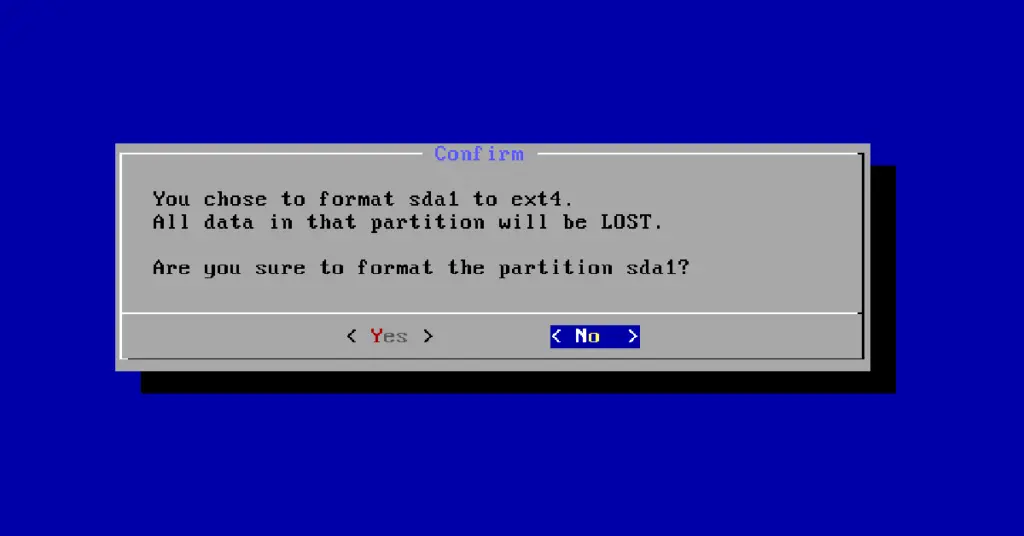
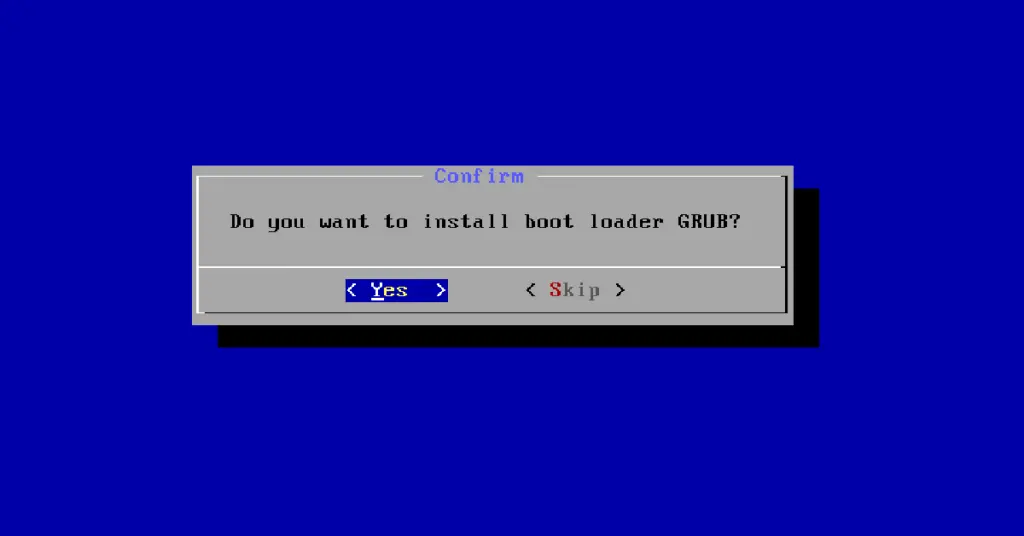
- Press Yes when the setup asks to install the boot loader GRUB.
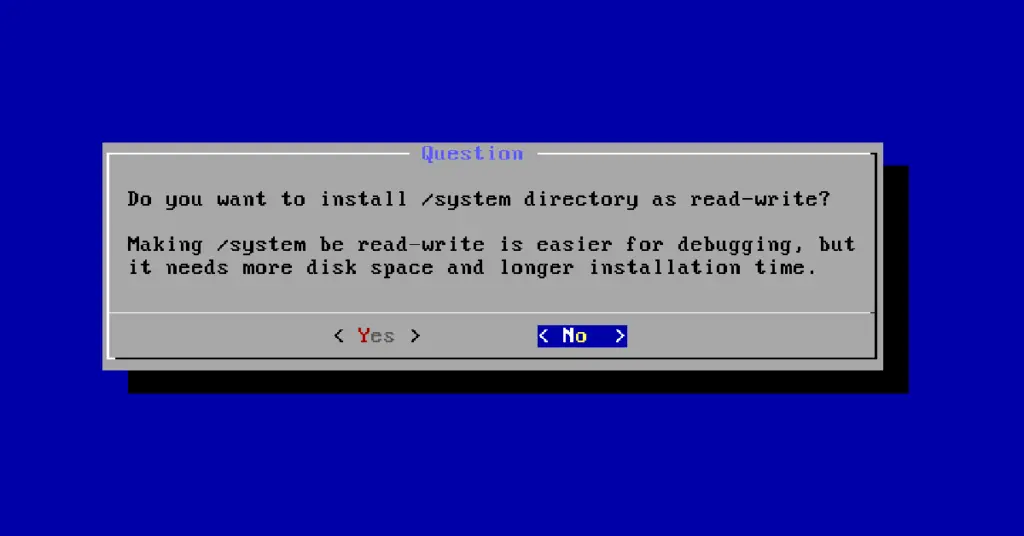
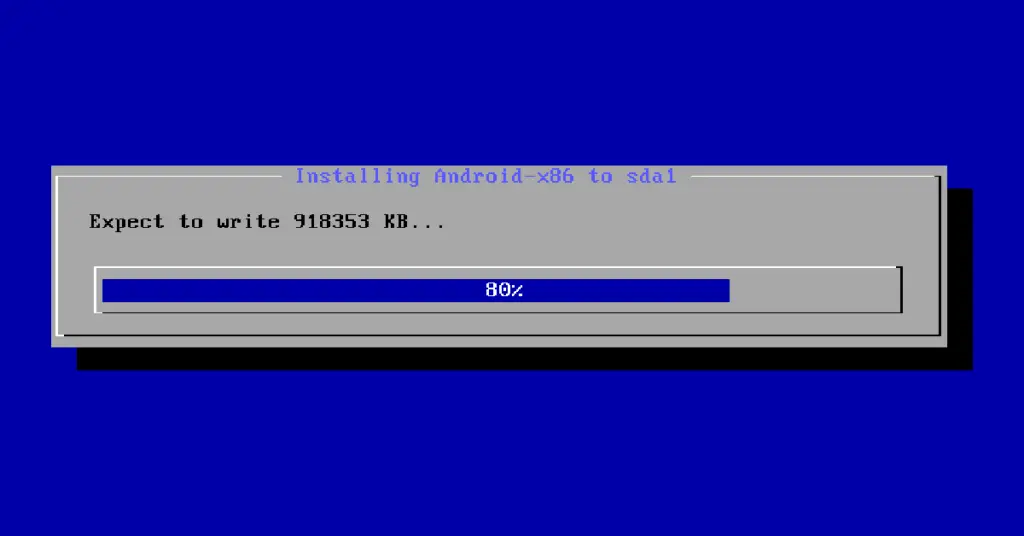
- Press No on the next screen, and the installation will start.
- Wait until the installation is done.
- Detach the Flash Drive and press on Reboot.

- The system will reboot, and Android x86 will get downloaded.
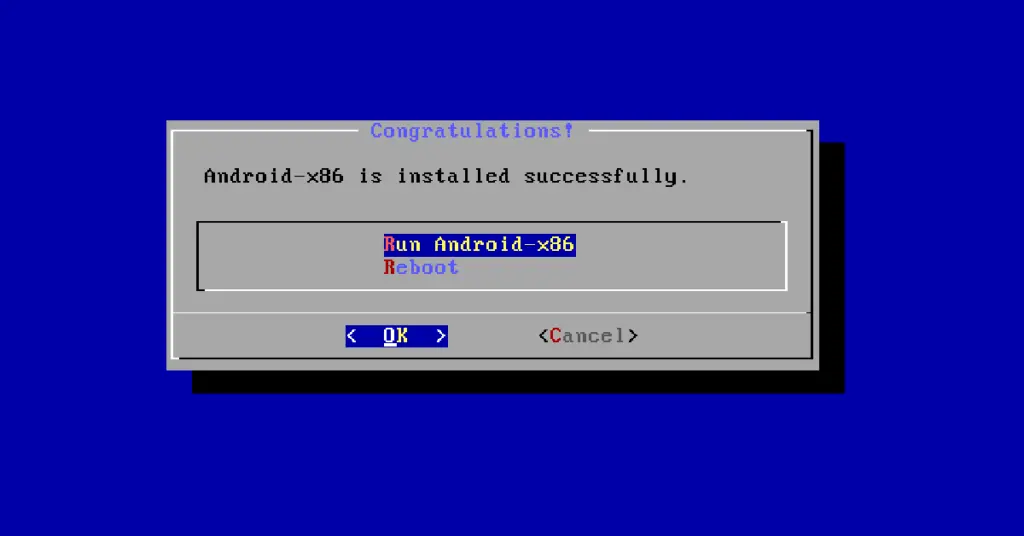
- Follow the on-screen instructions, and the Android OS will be ready to use.
Which one is the Best Android OS
Presently, Android is one of the most popular operating systems. Because of its popularity, a lot of Computer users are trying to install Android OS on PCs. Hence, we will provide information about the best Android operating system. When it comes to the best Android OS for PC, Bluestacks comes first in mind.
BlueStacks
BlueStacks by now.gg, Inc. is known as one of the best Android OS for laptops and PCs. With this OS, gamers can play a lot of mobile-friendly games on PC. It allows gamers to play mobile games locally. Also, players can play games in HD.
Features
- BlueStacks provides new and improved key mapping.
- It comes with customized controls for various games.
- This Android OS optimizes PC usage to run heavy applications.
- It ensures improved gameplay accuracy.
- It offers BlueStacks strategy guides.
Pros
- Supports Windows, macOS, and Linux
- The apps library contains a lot of applications
- Runs inside the existing operating system
- Improved and easy to use
Cons
- Doesn’t support some non-standard controllers
How to Use BlueStacks OS
To use BlueStacks OS, you need to follow three easy steps.
Step 1: Download and install BlueStacks Version 4.
Step 2: Download your preferred game from the Google Play Store within BlueStacks.
Step 3: Use the built-in default controls. You can customize controls as well.
Conclusion
Now you have clear knowledge regarding how to install Android OS on a PC. Follow the above steps carefully and enjoy the Android apps on your PC and laptop without any hassle. Also, make sure to use the best Android OS- BlueStacks to get the best experience. Hopefully, the information will be helpful for you.