Are you looking to get back to the iPhone setup screen? Perhaps you’ve recently purchased a new iPhone or want to reset your current one. Whatever the reason, returning to the setup screen is a straightforward process. we’ll walk you through the steps to help you start fresh or reconfigure your iPhone with ease.
Table of Contents
Why Would You Want to Return to the Setup Screen?
Before diving into the steps, let’s briefly explore the reasons why you might want to return to the iPhone setup screen:
- You’ve purchased a used iPhone and want to start fresh with your own settings.
- Your iPhone is experiencing software issues, and a factory reset is necessary.
- You want to change your Apple ID or iCloud account.
- You’ve received a replacement iPhone and need to transfer your data.
Understanding your motive is crucial, as it will determine which steps you should follow in the setup process.
Backup Your Data: The First Crucial Step
Regardless of your reason for returning to the setup screen, backing up your data is paramount. You wouldn’t want to lose precious photos, contacts, or other valuable information. Here’s how to back up your iPhone:
- Open the “Settings” app.
- Scroll down and tap on “iCloud.”
- Tap “iCloud Backup” and ensure it’s turned on.
- Tap “Back Up Now” to initiate an immediate backup.
Logging Out of iCloud and Apple ID
If you’re changing your Apple ID or iCloud account, follow these steps to log out of your current account:
- Open the “Settings” app.
- Scroll down and tap “Sign out of your [device name].”
- Enter your Apple ID password.
- Tap “Turn Off.”
Factory Reset: Starting from Scratch
To perform a factory reset and return to the iPhone setup screen, follow these steps:
- Open the “Settings” app.
- Scroll down and tap “General.”
- Scroll to the bottom and tap “Reset.”
- Select “Erase All Content and Settings.”
- Confirm your choice.
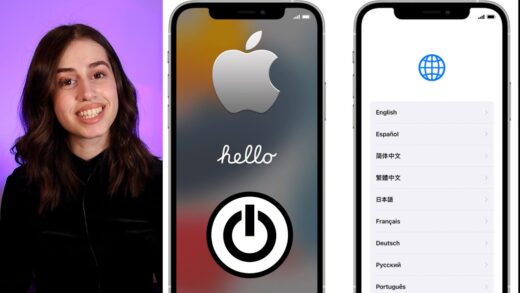
Initial Setup: Choosing Your Language and Region
Once your iPhone reboots, you’ll be greeted with the initial setup screen. Here, you’ll choose your preferred language and region.
- Select your language and tap “Next.”
- Choose your region and tap “Next.”
Wi-Fi Connection: Reconnecting to the World
To connect to Wi-Fi and continue the setup process, follow these steps:
- Select your Wi-Fi network from the list.
- Enter your Wi-Fi password.
- Tap “Join” to connect.
Data Migration: Restoring Your Previous Data
If you’ve backed up your data, you can now restore it. Follow these steps:
- Tap “Restore from iCloud Backup” (or “Restore from iTunes Backup” if you used iTunes for backup).
- Sign in with your Apple ID and password.
- Choose the most relevant backup from the list.
Setting Up Face ID or Touch ID
Depending on your iPhone model, set up Face ID or Touch ID for added security:
- Follow the on-screen instructions to scan your face or fingerprint.
Read More: How to Set Up iPhone with iOS Setup Assistant
Creating a New Apple ID
If you’ve decided to create a new Apple ID, follow these steps:
- Choose “Don’t have an Apple ID or forgot it?”
- Select “Create Apple ID.”
- Follow the prompts to set up a new account.
Privacy Settings: What to Choose
Review the privacy settings and choose your preferences regarding app tracking, location services, and more.
Setting Up Siri
Customize Siri’s settings, including when to activate it and your preferred voice.
Screen Time and Restrictions
Set up Screen Time to manage your device usage and apply restrictions if necessary.
Customizing Your iPhone
Personalize your iPhone by selecting your desired settings for sounds, display, and notifications.
Transferring Apps and Data from Other Devices
If you’re moving data from another iOS device, use the “Apps & Data” screen to initiate the transfer.
Troubleshooting:
If you encounter any issues during the setup process, refer to our troubleshooting guide in the FAQs section below.
Conclusion
Returning to the iPhone setup screen may be necessary for various reasons, and it’s a process that can be accomplished with a few simple steps. Whether you’re starting fresh or troubleshooting issues, following this guide ensures a smooth setup experience.